Fire Text w/ similar background
Do you want to make a picture such as this, for maybe your site? If you’ve Photoshop it’s a piece of cake!!! Follow the below steps and you’ll find that this very easy.
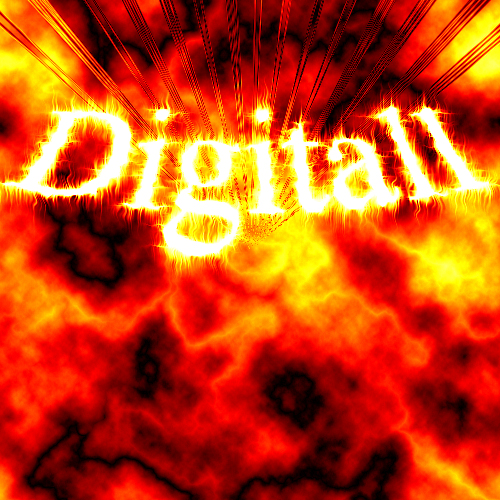
- First of all, in order to make that picture you should know a few things about it. It’s only a text, some lines behind it and a fiery background. Make a new document 500x500 pixels, white background and mode RGB. Now we are going to make the lines.
- Select black as the foreground color and with the paint bucket tool paint it black. Now select the foreground color as white, select the gradient tool and in it’s editor select the transparent lines. After that paint the left and the right sides with the gradient so your picture become as this:

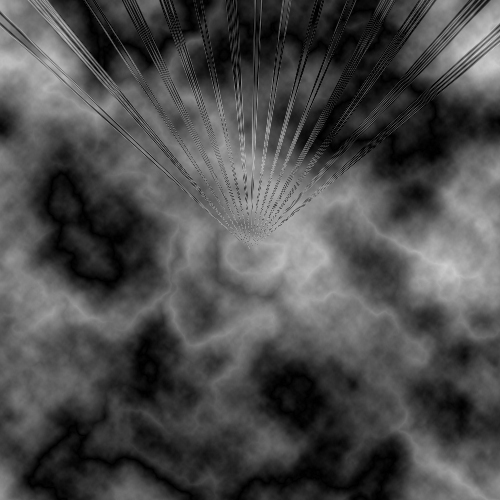
- The next thing we’ll do is to set the lines such as the finished picture. To do that go to: Filter/Stylize/Trace Contour. Set the level (128) and the edge upper, OK. Now go to: Filter/Distort/Polar Coordinates.

- Now we are going to make the background. It’s very simple just go to: Filter/Render/Difference Clouds and repeat the filter ‘til you have a picture similar to that one:
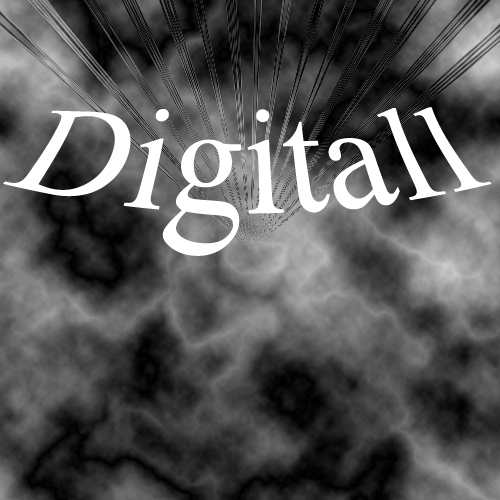
- Now it comes to the text. Select the type tool and go somewhere in the document place your text (usually on the top) with 18pt text, Times new roman (or anything you want, depending what you want to write), and select the create wrapped text, and write the following options, Shell Lower, Horizontal, bend +50, Horizontal distortion 0 and vertical distortion 0. OK and OK now you should have a picture like this:
- Carry on and we are goin’ to finish. There are only to steps remaining. The text effects and the color. In order to make the text effects you should do: Filter/Stylize/Wind (it’ll ask you about rasterizing the type, click OK.) Method wind, direction from the right. Repeat the previous step but with the direction from the left. Now go to Image/Rotate Canvas/90o CW, repeat the two steps of the wind and go again to the Image/Rotate Canvas/90o CCW. Finally go to Filter/Distort/Ripple, amount: 100 size: medium, OK.
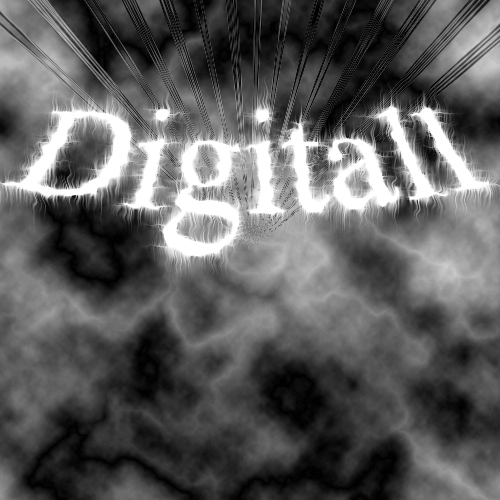
- It comes to the final step, the color. Go to Image/Mode/Grayscale (Click Merge). And now Image/Mode/Indexed Color (OK Flatten Layers). Image/Mode/Color Table à Table Black Body. (OK). Image/Mode/RGB Color and then you have it
- Do you think that you’re finished, NO. This is just an example, use your own imagination and make a better one. (Changing the Fonts, the texts’ wrap, the clouds, the colors, the lines). Good Luck!